Showing posts with label Teacher Tips Tuesday. Show all posts

Tuesday, July 31, 2012

Teacher Tips Tuesday!

It's Tuesday again (can someone please slow the summer down!). 
Button
 I'm super excited to have yet another fabulous blogger!  Today I have April from The Idea Backpack here!  She has some great organizations tips for you!

I am excited to help in Tori’s Teacher Tips Tuesday. My name is April Walker and my blog is the Idea Backpack (ideabackpack.blogspot.com). I taught for almost 4 years. For the last few months I have been working as a technical writer because teaching jobs are so difficult to obtain! It has given me a new appreciation for writing, formatting, organization, and editing though. I live in Dallas, Texas. My teaching experience is with grades 3-6 for English and Social Studies.

My natural bent is too over-think and make lists for everything. In my several years of teaching, I did learn a few things about organization though. I have seen lots of teacher-bloggers making really cute binder covers for a main teacher binder. I have been making binder covers myself, mainly because I want to move most of my files over to binders. Here are a few tips on a teacher binder, though.

A Teacher Binder

1) Dividers!

Get dividers in different colors and sizes. I love the dividers with pockets. Why? Well, as much as having the perfect binder with all the right sections sounds perfect; the truth is in the middle of the chaos of your day, you don’t always have time to hole-punch things. You can always throw lessons and handouts in the pocket to be hole-punched later. I also love the dividers with pockets because they are larger. This allows you to also use normal dividers to allow for even more sub-topics of organization. For example, I might have a pocket divider for the first six weeks and then behind it other dividers for tests and lessons or a divider for each subject.

Avery Multicolored Plastic Insertable Tab Dividers, 8-Tab


The picture of the purple folder/pocket thing is great, too, to throw in your binder. You can store all sorts of extra whatever in there. It closes up too, which can be helpful.

2) Make it your own

Just because someone else has one set of categories doesn’t mean that is right for you. I have tried having dividers for each subject, reading groups, and even a divider for each six weeks. I like keeping my lessons and copy of all activities and tests in the binder. It makes it easier when I have to run and make a copy of something. When I taught multiple grades and subjects, I had a binder for each grade. Then within each grade, I had a section for each subject. I always include a general section at the front for school info, field trips, parent logs, etc.

3) Put sections for things you will really use

Some years my sections were based more on what I was told had to be in my binder than what was really useful for me. Make sure you re-evaluate as well. If it's not working, change it up.

A Teacher Notebook

I would also recommend having a college-ruled notebook. I like having a 3 subject notebook. I didn’t like taking my teacher binder to staff meetings because it was too bulky. I found a notebook to be easier. I use the first section for meeting notes, the second section for writing lesson planning ideas and to-do-lists, and the third section for professional development.


It is a little pricy, but it comes with a little calendar, pockets for all those meeting handouts, and post-it flags. You can find them on sale, too.

My biggest struggle was probably taking and storing anecdotal student notes on reading and other types of conferences. How do you organize your teacher binder? What sections do you find essential? If this has been helpful at all, I would love to hear from you at ideabackpack@gmail.com.

Thank you so much April!  I LOVE learning about new tips from others...especially things that have worked out well!

**Remember to stop back tomorrow as I will be reviewing some products of a blogger friend as I link up with Jessica Stanford's Product Swap!!  I'm excited!**

Last thing... I'd love to have YOU be a part of Teacher Tips Tuesday!  Please email me for details...it's super easy!
Thanks for stopping by!


Tuesday, July 24, 2012

Teacher Tips Tuesday!


Grab My Button!

Hooray it's Tuesday! :)  I'm very excited to have Sara S. here from Smiling in Second Grade!  I absolutely LOVE her stuff (as a fellow second grade teacher) and steal her ideas all the time! (shhh don't tell her! ;) 
Here's Sara's Tip...

My prized possession in my classroom is my Reader's Workshop binder.  It has all the data I need and it's all in one place.  And it's BIG!  You can't really tell from the picture, but this baby is huge.  I think it's  a 3-inch binder?

Here's the cover:

I got the beautiful cover from somewhere in blog-world, but for the life of me I can't remember.  If it's yours or you know who made it, let me know so I can give them credit!

On the inside cover, I have two pages back-to-back in a sheet protector.  The front side is my students names and their levels during each month of the school year (no pic for privacy).  The back side has correlation levels:

We use Guided Reading Levels, Rigbys and DRAs in our school.  This chart helps me keep all those numbers and letters straight!  A colleague made a pretty colored one for us for next year though!

Next, I have a pocket for each student.  Their names are on the tabs on the right.  In the pocket are any assessments I do with that student.


Behind the pocket, I have a chart that shows how the child is progressing throughout the year compared to where they should be.

{This kid did great!}

After that, I have a CAFE menu for each student.  I place a check next to the ones the student has mastered. 


And finally, I have my anecdotal notes for each child.  I take notes on an Avery label and then stick in the binder later on.


You can get this chart in my {TpT} store for free!

So that's what my Reading Workshop binder looks like!  What's in your binder?


My name:  Sara Soucy

The years I have been teaching:  3
The grade(s) I have taught:  2nd
The state/area that I teach in:  Rhode Island
My blog web address:  

Wow, thanks so much for sharing Sara!  We'd love to hear what you have in your binder!  Please share!  Don't forget to stop by Sara's AMAZING blog!! {CLICK HERE}


p.s... I'm looking for some more people to share their GREAT tips!!  Please {EMAIL ME} to team up! It's super easy and fun!!  Thanks!


p.s.s... Stop back tomorrow to vote on your favorite "Caught Reading" pic!! Here's the last entry...Dana from Fun in First Grade was caught reading too!
 I am at the top of the St. Louis Arch reading my emails!  Great reception up there! :)

Tuesday, July 17, 2012

Teacher Tips Tuesday!


Hooray it's TUESDAY!  Time for another great

 tip from another GRRReat blogger friend! :)


 Mrs. Dwyer's a+ firsties

Today's blogger is Tanya from Mrs. Dwyer's

A+ Firsties!  Did you know that Tanya was

my VERY FIRST follower?  That just makes it

 all that more special that she is here on my

 blog today! :)  Make sure you stop by her

 amazing blog...she has great ideas on there

 all the time and I'm a HUGE blog stalker of

her blog :) 

Here we go....
Have you received an invite from a friend to join Pinterest yet?  You may be living under a very huge rock if you haven’t heard of it! I just had to share it as my teacher tip! I’m beginning to wonder how I ever got along without it!

At first glance, I wasn’t sure what I would use it for at all…BUT now, I’m on it daily and LOVE the many ideas I’ve found to help enhance my classroom and home!
(www.teachingblogaddict.com)


I’ve found everything from great classroom activities, printables,  and ideas to recipes, quotes, and hilarious funnies!

(classroomfreebies.com)
 Now that most of us are caught up in a pinning craze…there is a new site on the horizon to keep us hoarding digital goodness!  This next one, may be even sweeter because its targeting all things “teacher”!  It’s just for educational ideas! Yay!

Do you have an idea that worked wonders in your classroom? An anchor chart or new product you’d  love to share?  Pinterest and educlipper would be great outlets to consider!
Educlipper is still just getting up and running, but be on the look-out.  I believe we’ll soon be finding lots of fab ideas there as well!
Happy Pinning (and clipping) everyone!


My name:  Tanya Dwyer
The years I have been teaching: 12
The grade(s) I have taught: 3rd, PK and now 1st {where my
 heart is}
The state/area that I teach in: The Great State of Texas

My email address: aplusfirsties@gmail.com

Wow, did you happen to watch that video... I'm SUPER excited for that site to get up and running!  Sometimes I get a little bit overwhelmed with Pinterest...maybe this new site will solve that problem! :)  Thanks Tanya!!  Stop by her blog {click here} and tell her what you loved about her tip!

We had some more fun link-ups to the "caught reading" linky!  Click below to check them out!!  ONLY 6 days left!  Quick... link up today!! :-)

Thanks for stopping by!

Tuesday, July 10, 2012

Teacher Tips Tuesday!


Hooray for Tuesday!  I am super excited to have Monica Talley from Treasures for Teaching guest blog today!  Make sure you stop by her totally cute and jam packed with ideas blog!!
Treasures for Teaching

Organization ~ Math
I got this tip when I went to a math workshop. We make our calendar pieces thematic (for fun) and use them to work on content skills that are in our curriculum. This is where you can differentiate by skill level. Some students can start the pattern, other students can continue the pattern, and other students can complete more than one calendar piece. One piece of advice, take pictures of your old calendars. That way, next year you can remember what went well, what didn’t work so well, and calendar patterns you do not want to try again J

Here a couple examples from this past school year:
For the January calendar, they created winter scenes (the fun part), and added “snow” as they skip counted by 2s (lucky for me I don’t clean out my 3-hole puncher every time I use it). According to their ability, the students either put 2, 4, 6, 8, 10, or 12 “snowballs” on their calendar piece, and then the pattern started over. 
For the April calendar, I found an umbrella pattern online. My students decorated their umbrellas (the fun part), and then they chose a background color according to our pattern: A, B, B, C (or 1, 2, 2, 3). If a student made a mistake, they simply cut out the umbrella again, and glued it on the correct colored background.
As the students complete their calendar piece, they place them on the calendar. I can quickly assess who still starts from day 1, who starts at the beginning of the pattern, who can continue the pattern, who can count on, and who still needs more time with me J.

Organization ~ Language Arts
BEFORE!
We all want our books to be sorted and organized and put back where they belong by our students. But, that is something that needs to be modeled again and again for most of our students. I’ve tried generic labels (yes, those are recycled air filter boxes), and it worked for some students, but not for all. I use The Daily Five, and wanted my students to be able to “book shop” independently. So, I searched the local Goodwill and Thrift stores and bought a lot of plastic magazine holders to better sort the books. This is what I came up with:
AFTER!
The idea is not new, but for me it worked to sort part of my library by favorite author, genre, and by season. (Note the Dr. Seuss box is empty due to their popularity with my students.) This author sort worked great for me and (most of) my students this past year. They knew where to look for a particular book, and where to return it when done.

The only thing I want to add is a numbered dot to each book that will match the number on the holder. I can’t tell how you easy it was for my students to empty their book boxes at the end of the year and put the books back where they belonged! Seriously, it saved me a lot of time and stress at the end J

My last tip for organization is for your word wall. I got this idea online or at a workshop (before Pinterest existed), and it helps me keep my word wall words alphabetized, easily accessible for a lesson, and stored all at the same time.
I bought colored library pockets at the local teacher store and laminated them. I used an exacto knife to reopen the slit at the top and labeled each one with the letters of the alphabet. I attached magnetic strips to the back so that they would hang on the board. You can also buy the library pockets to match your theme. This gives you instant access and storage.


I hope these tips help you in your classroom. If you have any questions or comments, feel free to leave them below or send them to treasuresforteaching@gmail.com.


My name: Monica Talley from Treasures for Teaching
The years I have been teaching: starting 9th year…yikes!
The grade(s) I have taught: all in 1st (same school, even same room up until 3 years ago)
The state/area that I teach in: big ol’ Texas

Thanks so much Monica!  Don't you just love TUESDAYS?! :)

If you are interested in being featured... just email me!

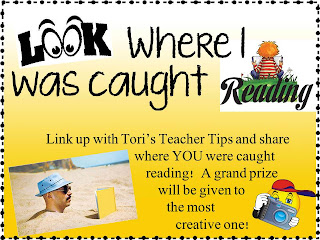
Don't forget to link-up to the "Look where I was caught reading" linky party!  You can do so by clicking on the picture below:


Yeah, Emily and I just hangin' out doing a little Read to Someone....


Look for more fun picture examples from me this week!!
Link up people or I'm taking all the prizes!! :) heehee...


I'm also at SMART Board training all this week! I'm super excited and will hopefully learn some new tricks! :)